Intro to Rigging
Now that we’ve made our penguin, we’re reading to move onto the next step - rigging.
For those of you who are familiar with rigging with bones (like in 3D software such as Blender, Autodesk Maya, etc...), this will be a fairly simple task. They are shaped like the Octahedral visualization of bones.
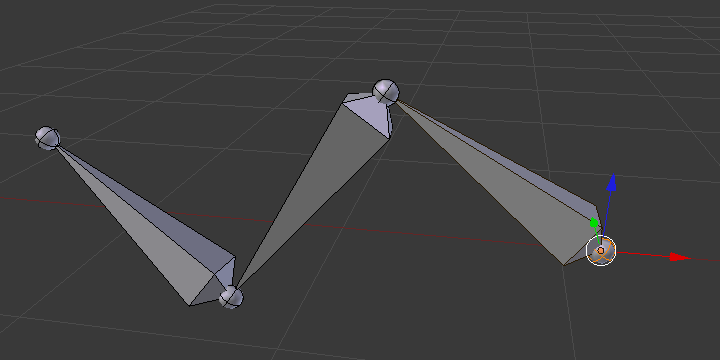
Octahedral bone display, courtesy of the Blender 2.79 Manual
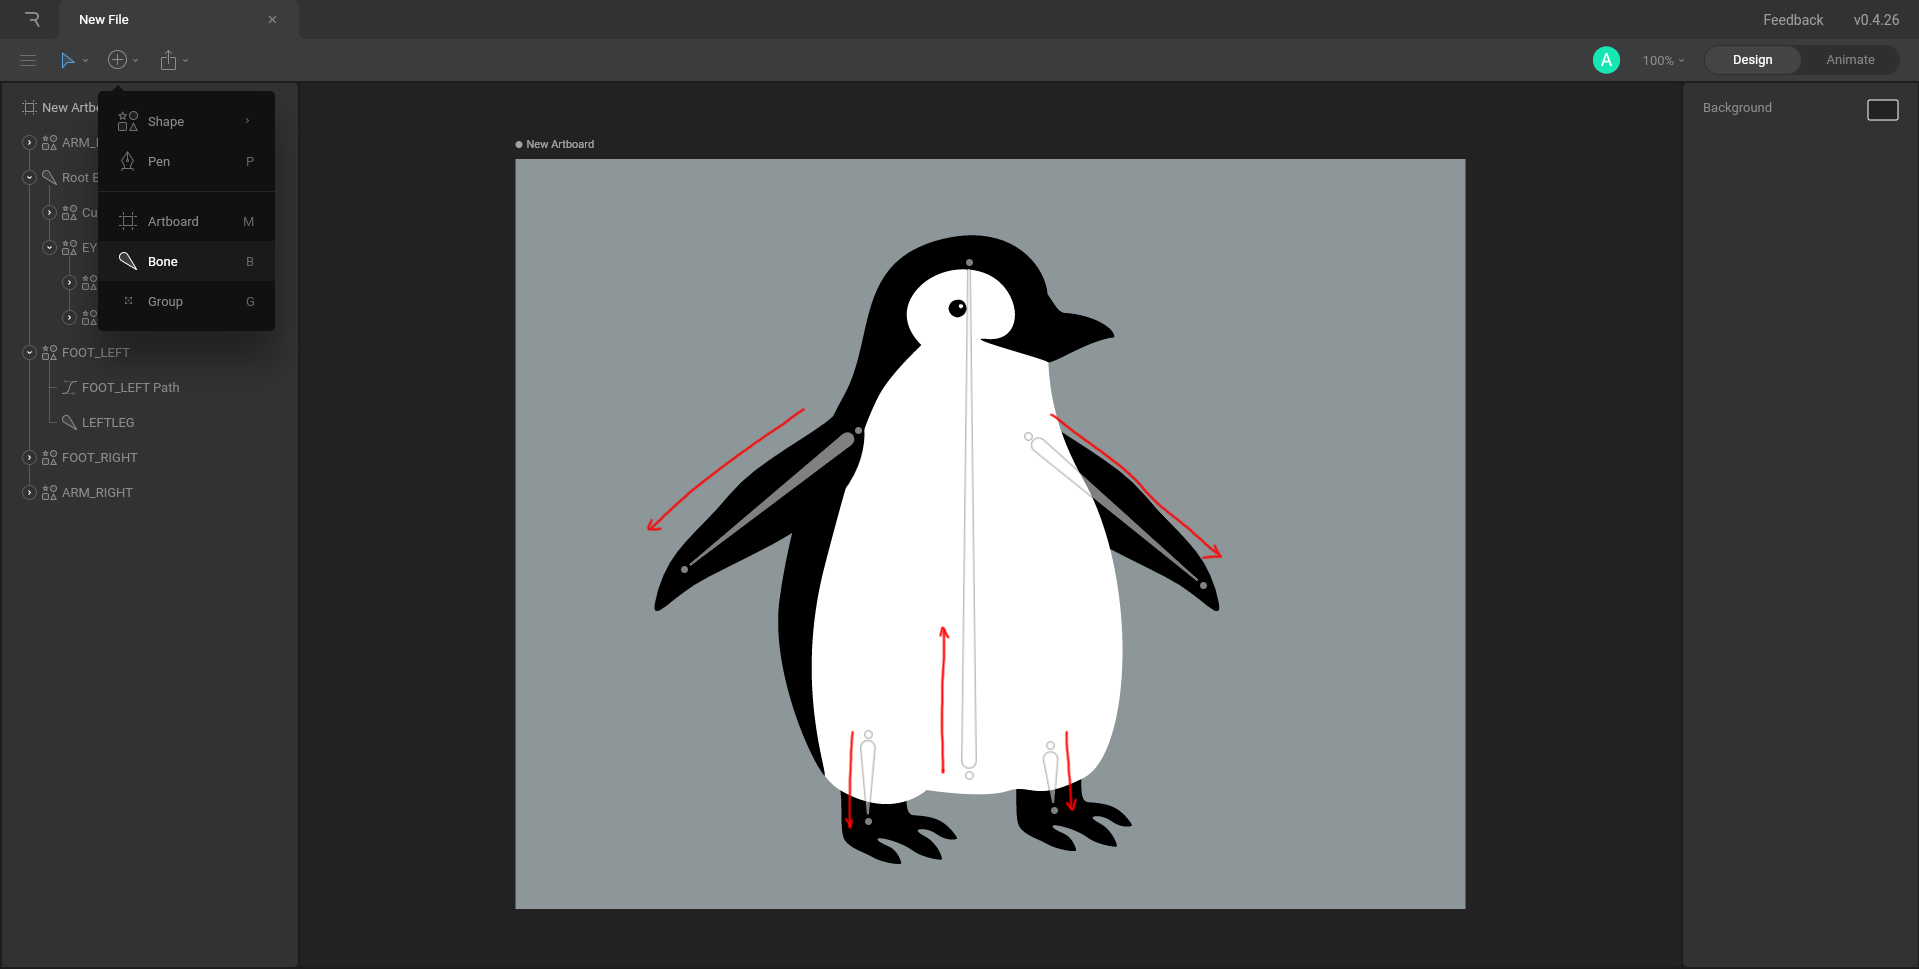
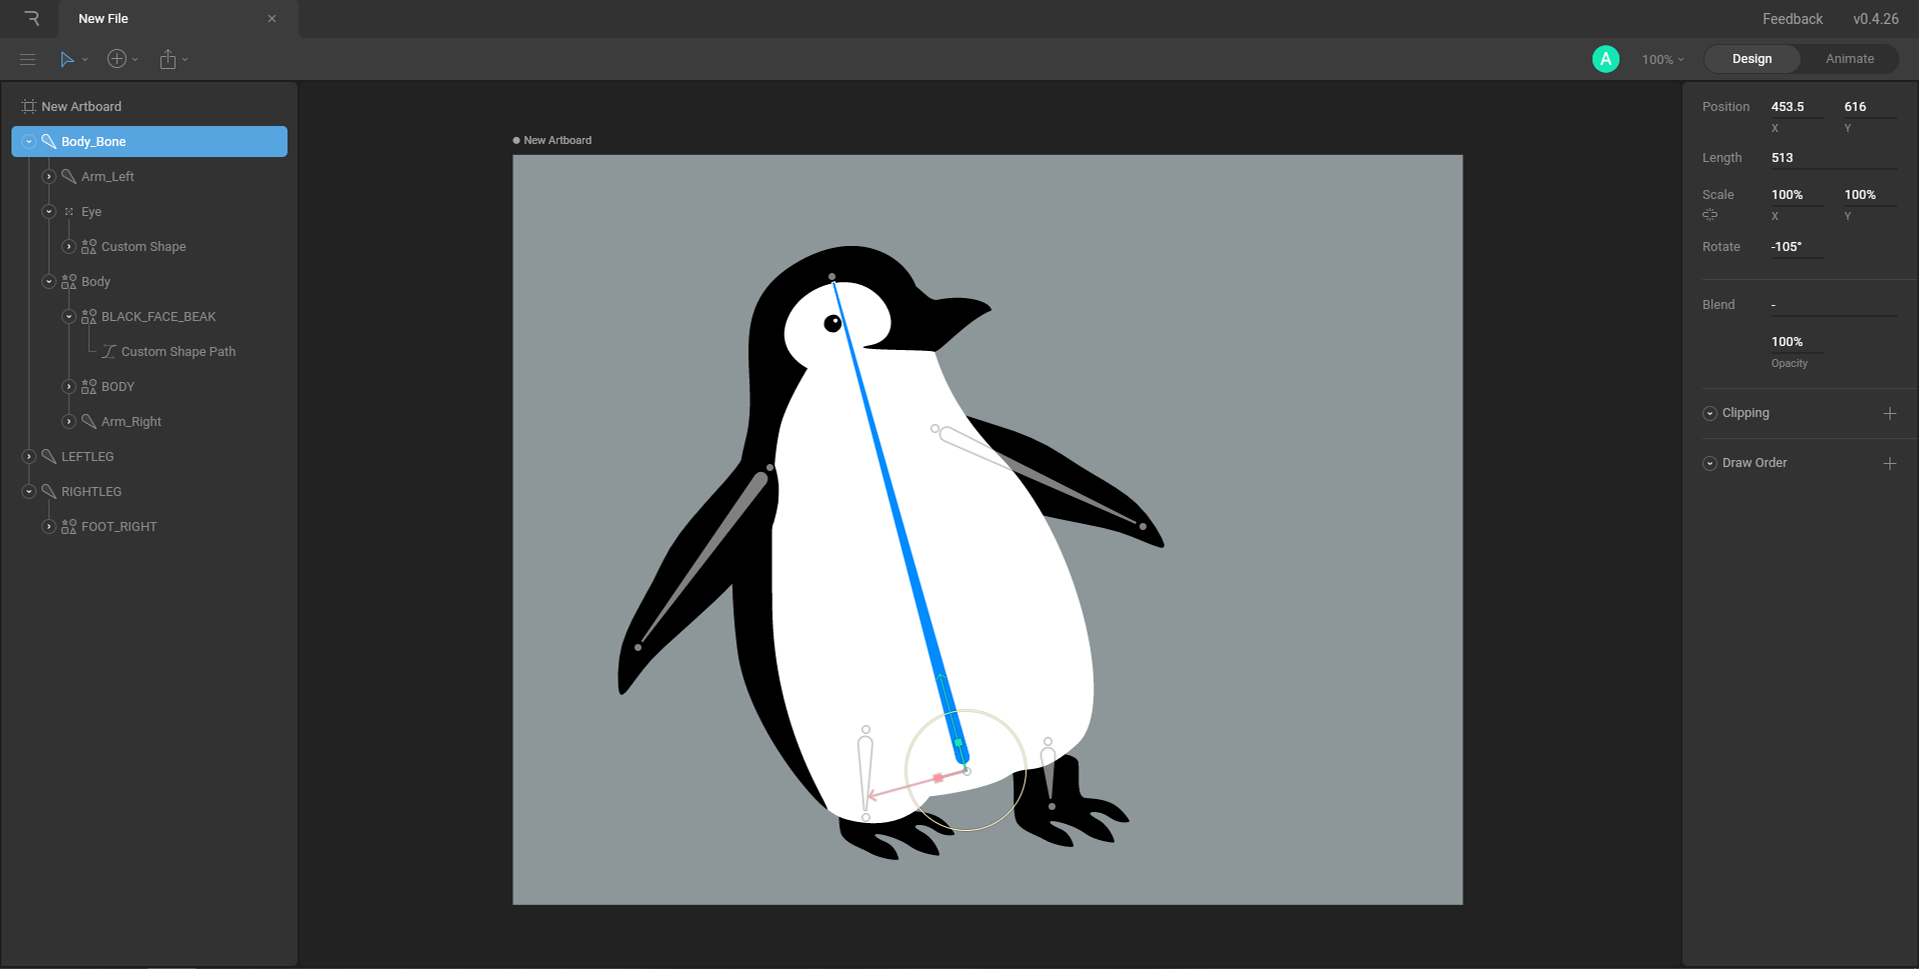
These bones are shaped like soft-edged triangles. In Rive, by selecting Bones from the Create Tools (keyboard shortcut B), left-click on where you’d like your bone to start (root) and click again on the area where you’d like to end it (tip). The roots of these bones are thicker, while the tips are thinner. Since we’re making a simple animation, we will only have 5 bones. Let’s start with the main bone for the penguin’s body. The root of the bone should start between its legs and the tip should be in the center of its head. The next two we’ll place in its legs, and the next two, in its flippers.
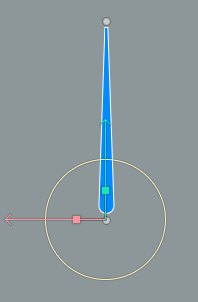
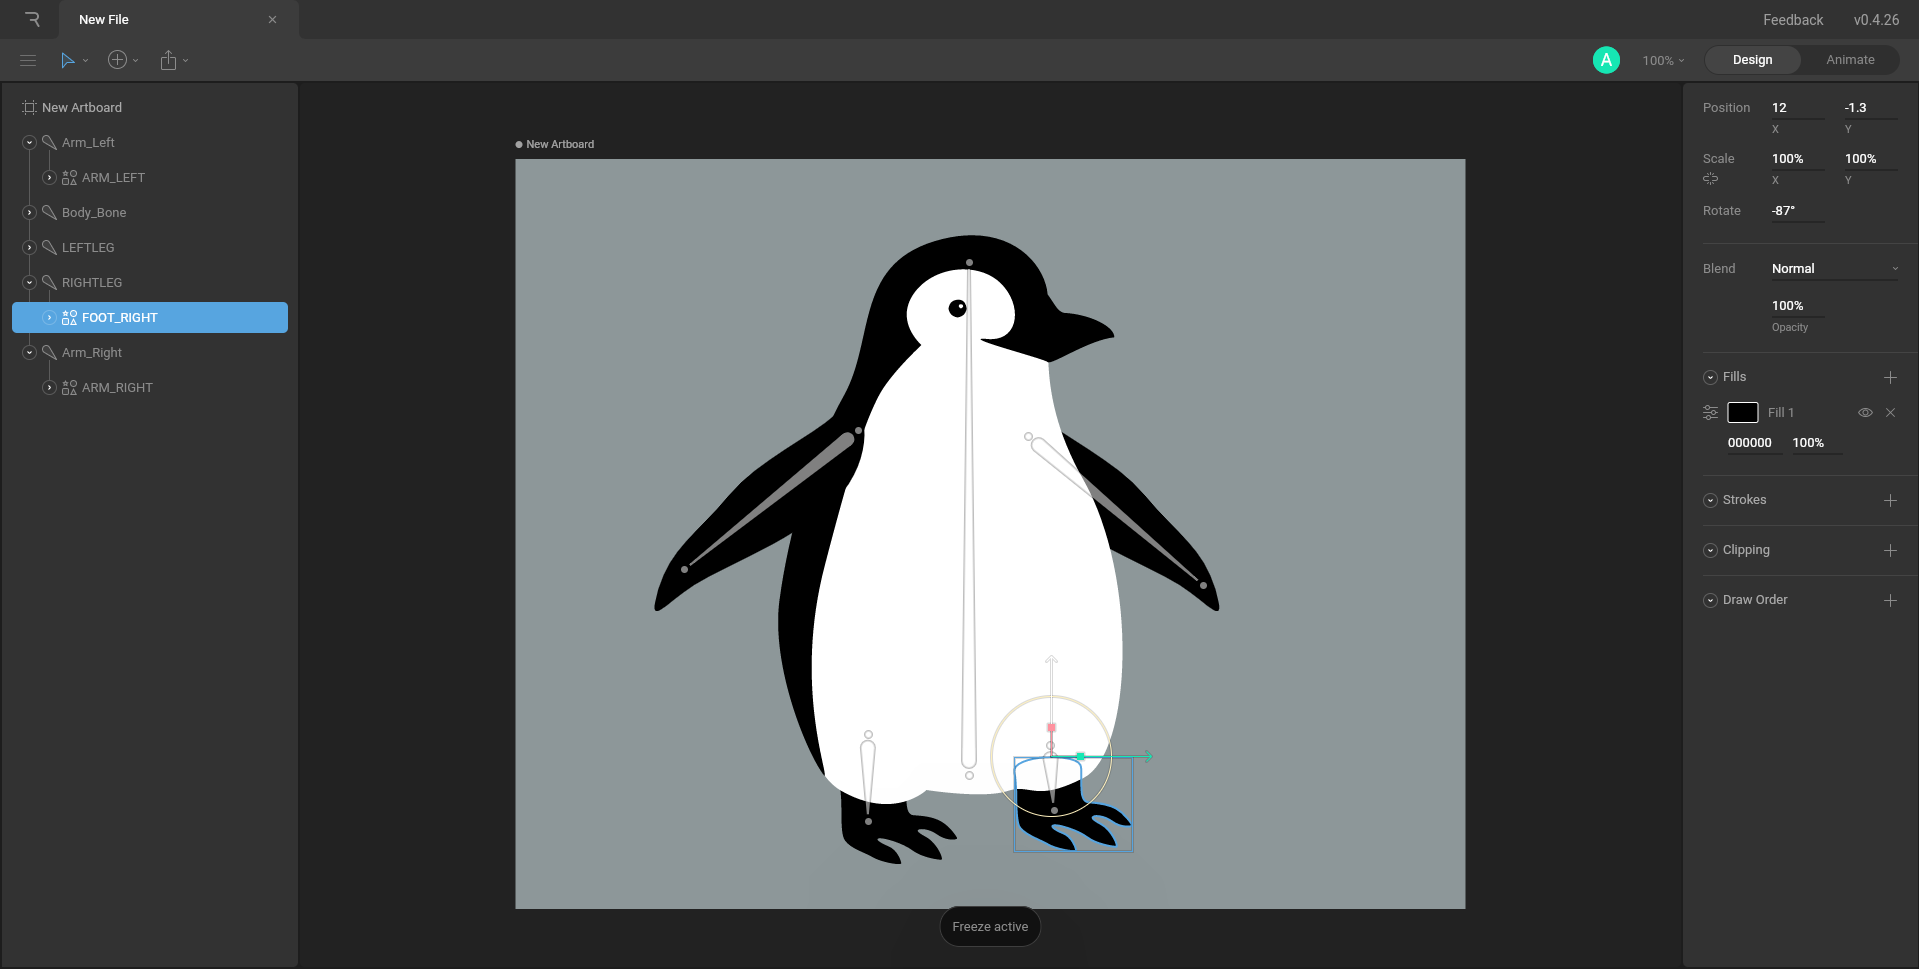
Sometimes when bones are added or parented / connected to artwork, their Pivot (also called the origin or anchor point) points can change, or we just won’t be happy with their current position.
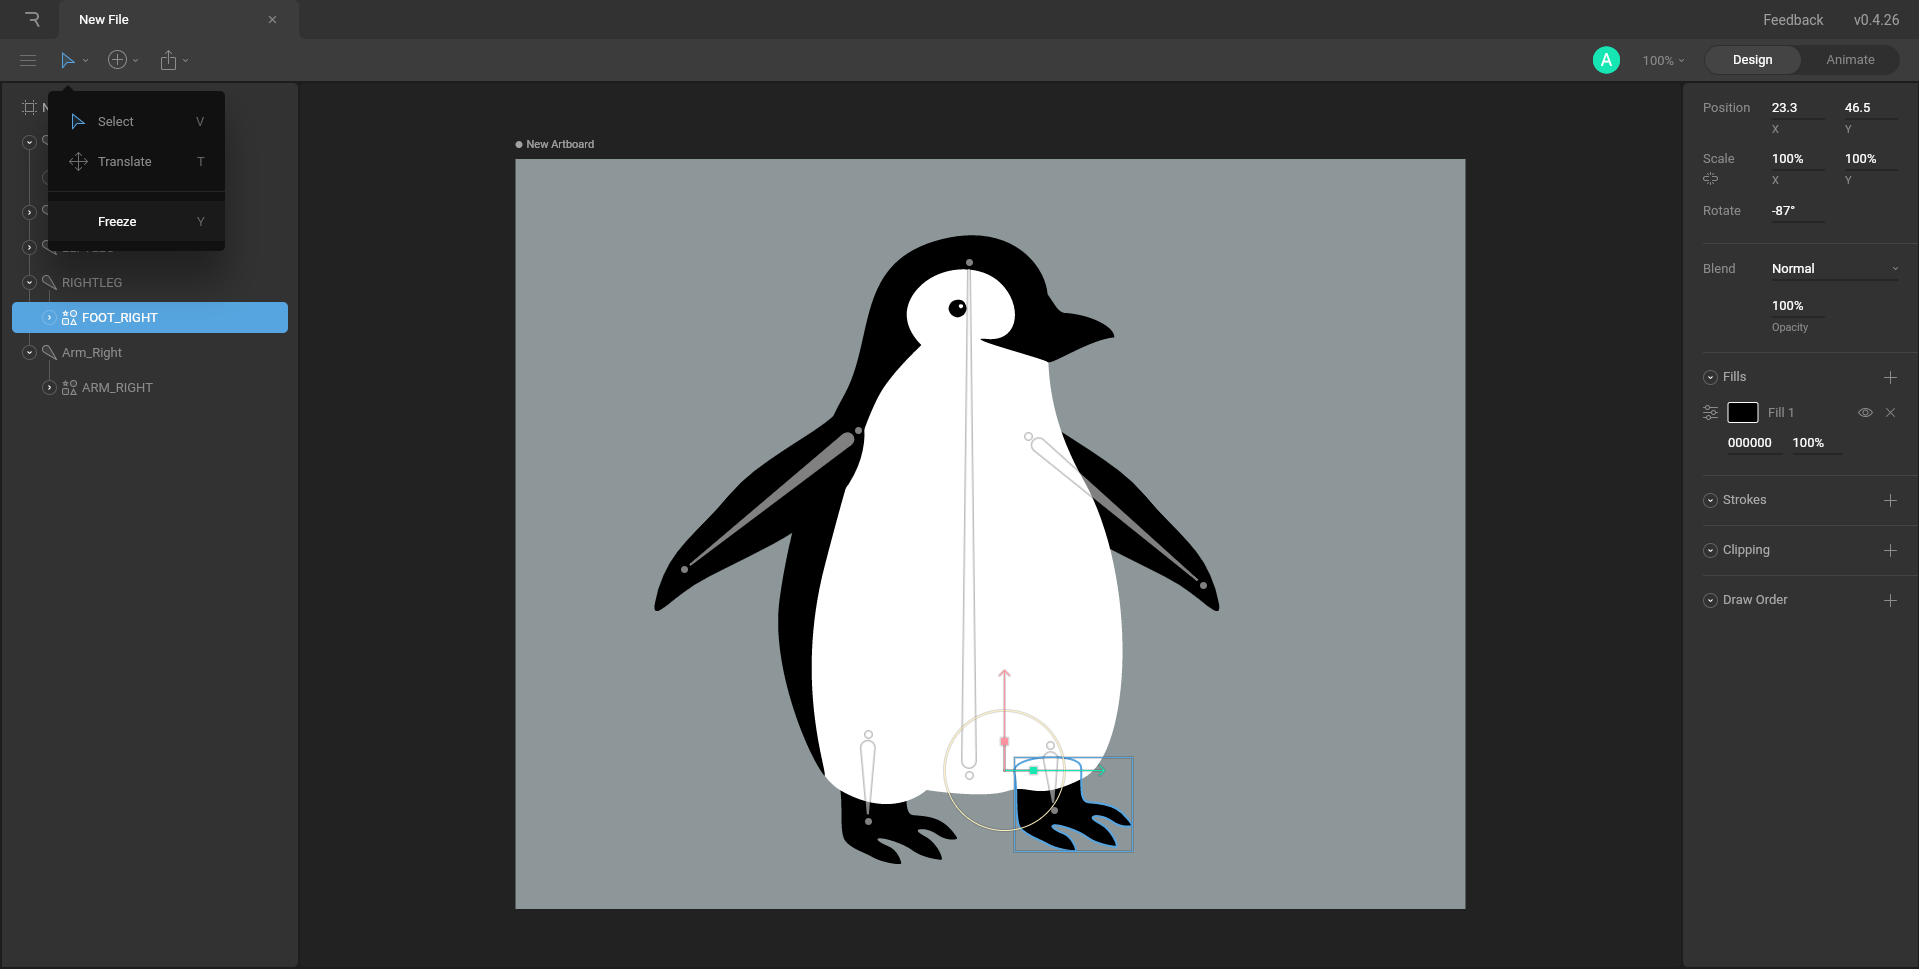
To change it, head to Transform Tools and select Freeze (keyboard shortcut Y). This will allow you to move the Pivot point wherever you’d like. Normally, the Pivot point of bones is located in the Root of the bone.
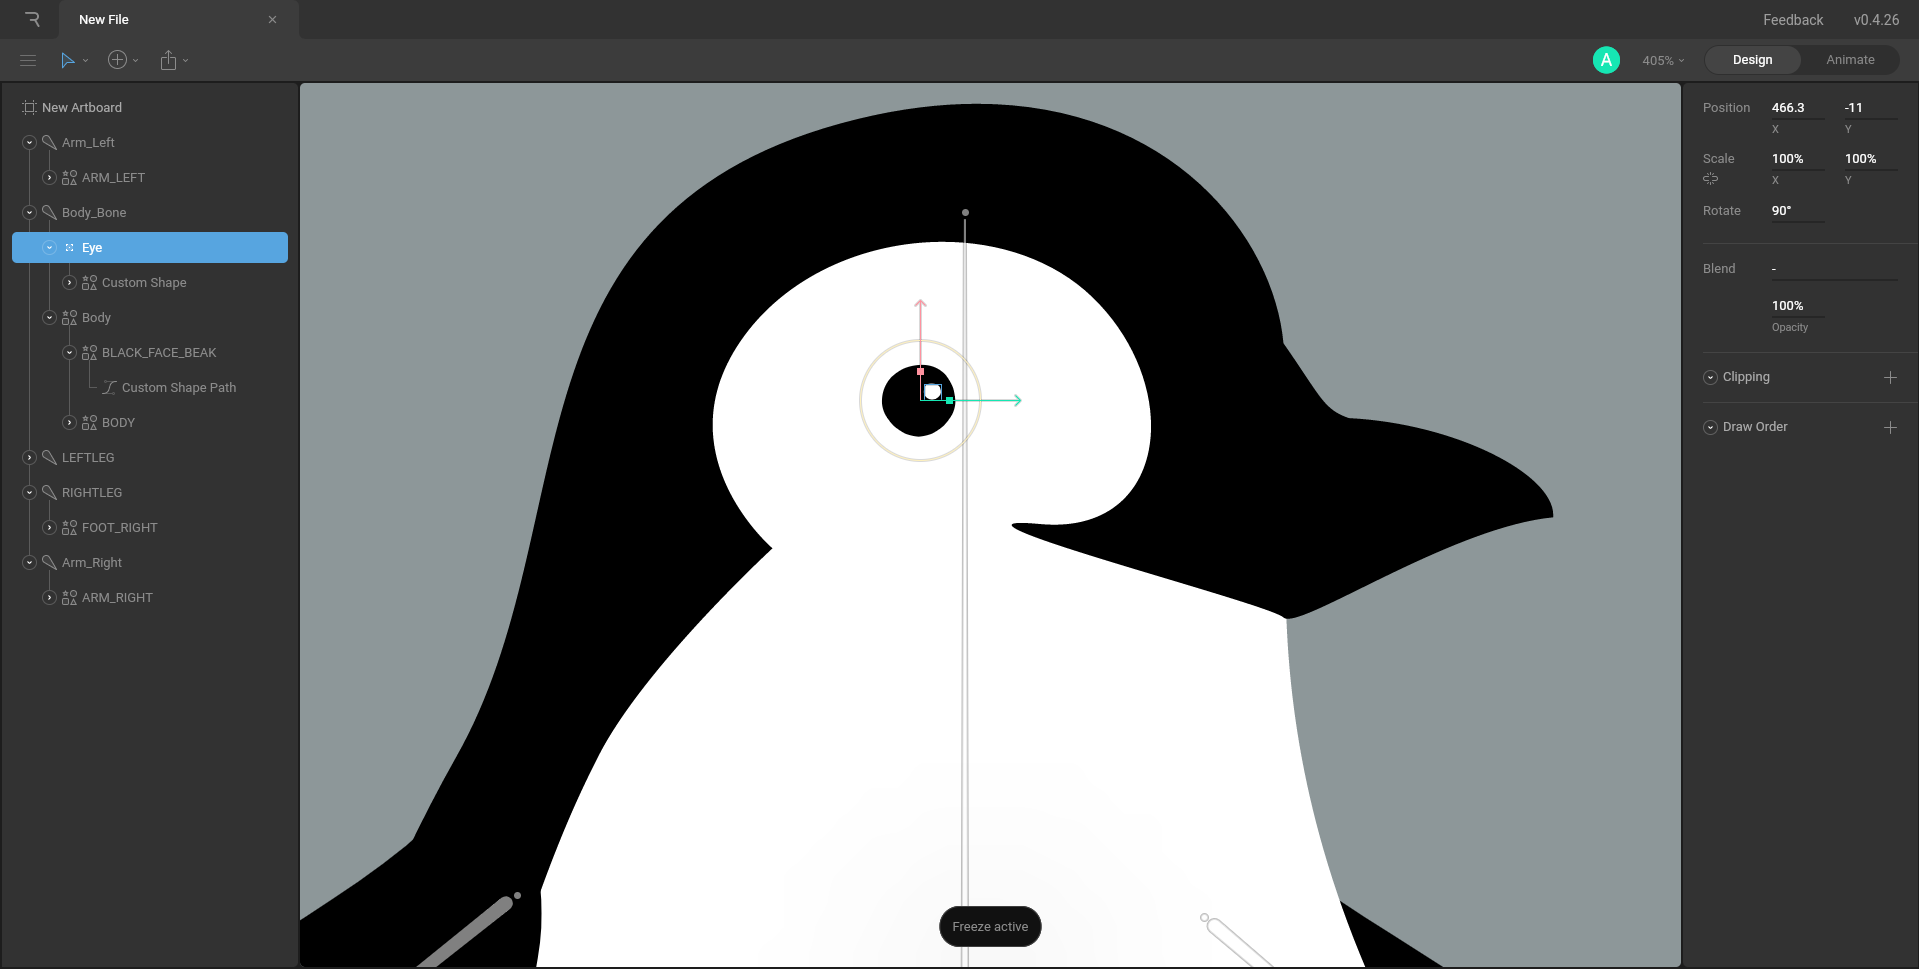
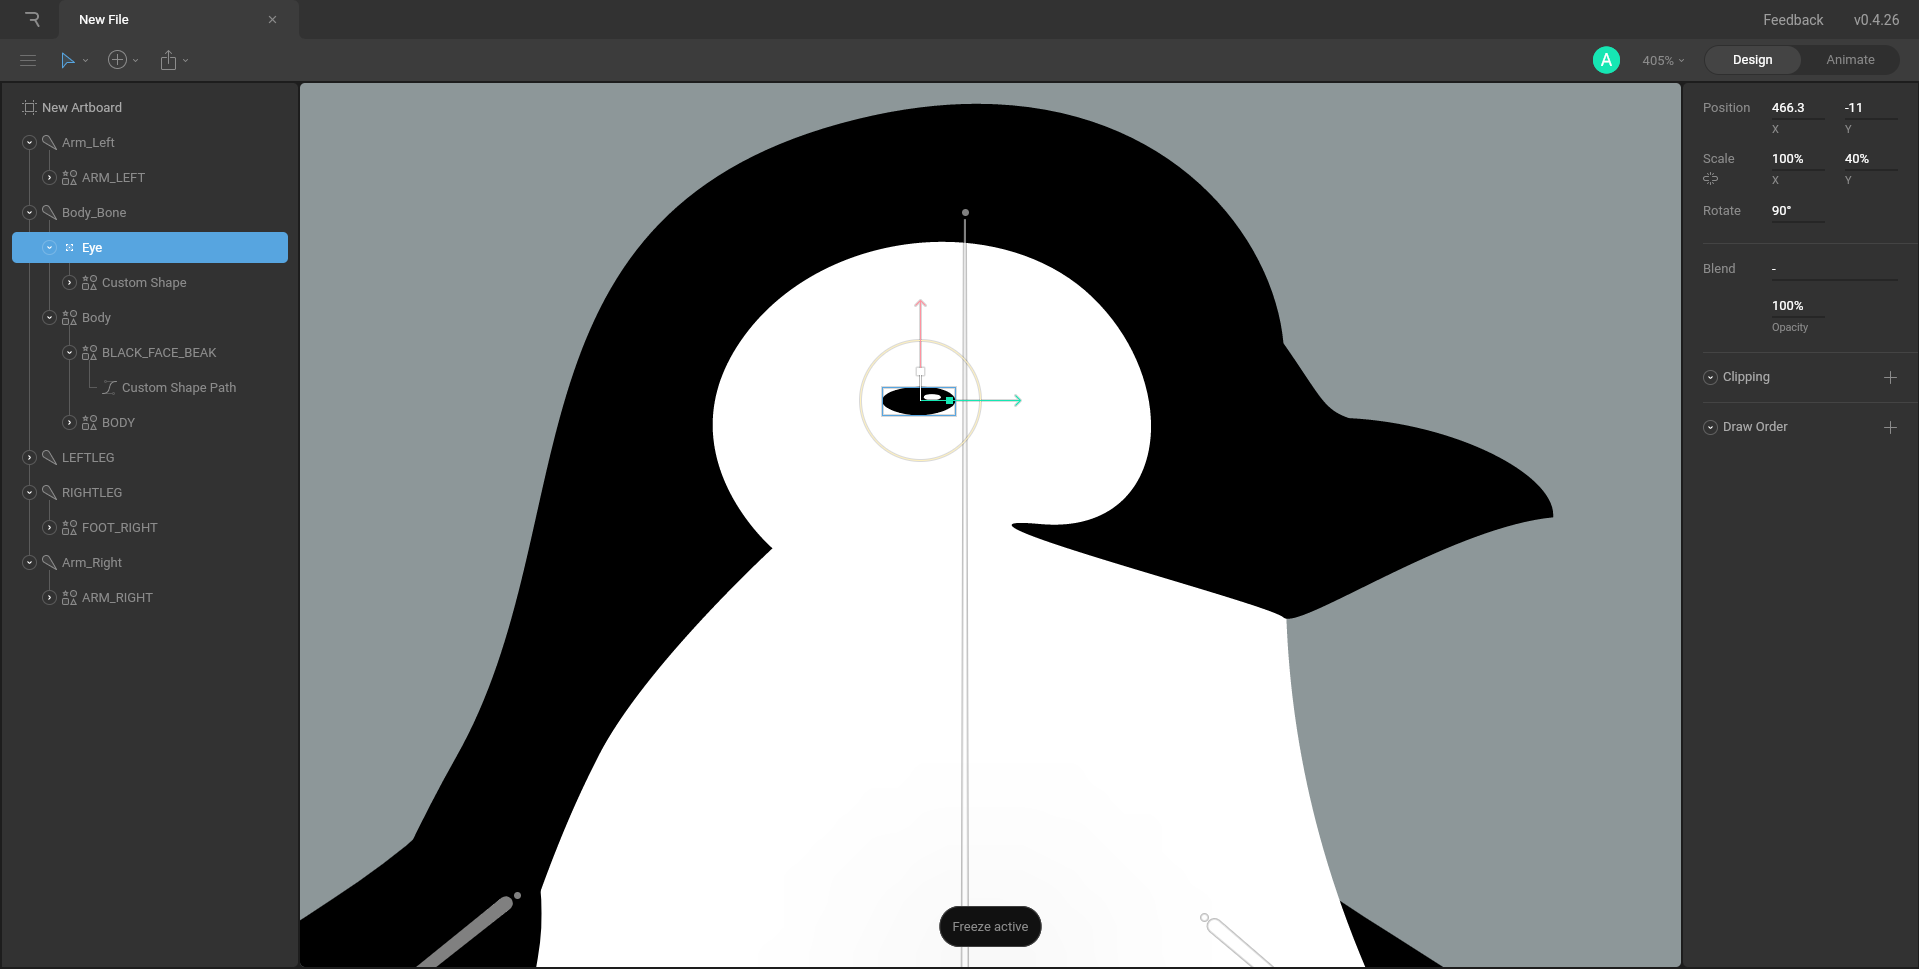
In order to open and close our penguin’s eye, I’ve added a new group in its center, making the Pivot point also centered. The eye and the shine were dragged and dropped into the newly-made group. Another Bone isn’t necessary because, in Rive, the size and location of an artwork can be manipulated without adding Bones.
Now that we have all our bones and we’re happy with their position, let’s take a look at the hierarchy to the left.
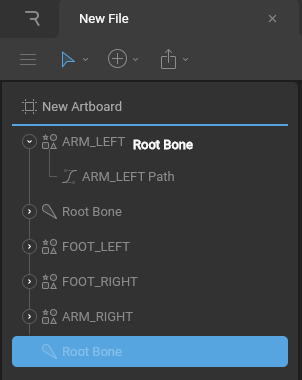
To parent / connect bones to artwork in Rive, simply drag and drop your artwork onto the desired bone. A good thing to do would be to name your bones, it will make animating a lot easier later.
In the end, your hierarchy should look something like this:
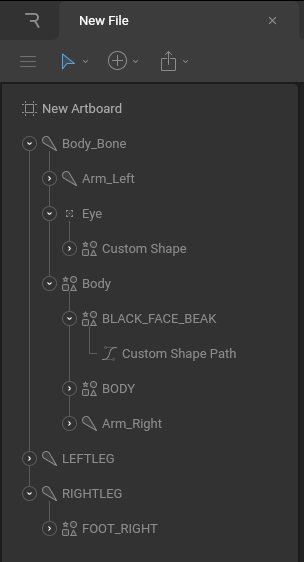
Notice how we’ve parented parts of the artwork and bones. The Body_Bone contains the Bone that dictates what the body will do, as well as the flippers and its bones and the eye group. This was done so when we move the penguin’s body, its flippers will follow the movement, and the eye will also stay in its place. Meanwhile, the legs were left separated, with both legs connected to their corresponding bones
The body, along with the flippers, remains at the top of the hierarchy. The legs are the last, making them hidden behind the body, just like in the previous part of the tutorial.
Onwards to part 3 of our tutorial!